


FB4 MAX is a new network hardware from Pangolin, that opens up a whole new world of possibilities for professional laser show control.
THIS PRODUCT INCLUDES FREE
DELIVERY ANYWHERE IN THE WORLD
1-888-769-5667
1-512-220-9339
Toll Free
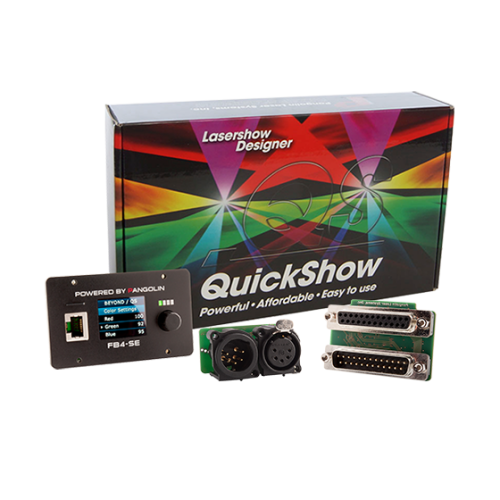
FB4 MAX WITH QUICKSHOW
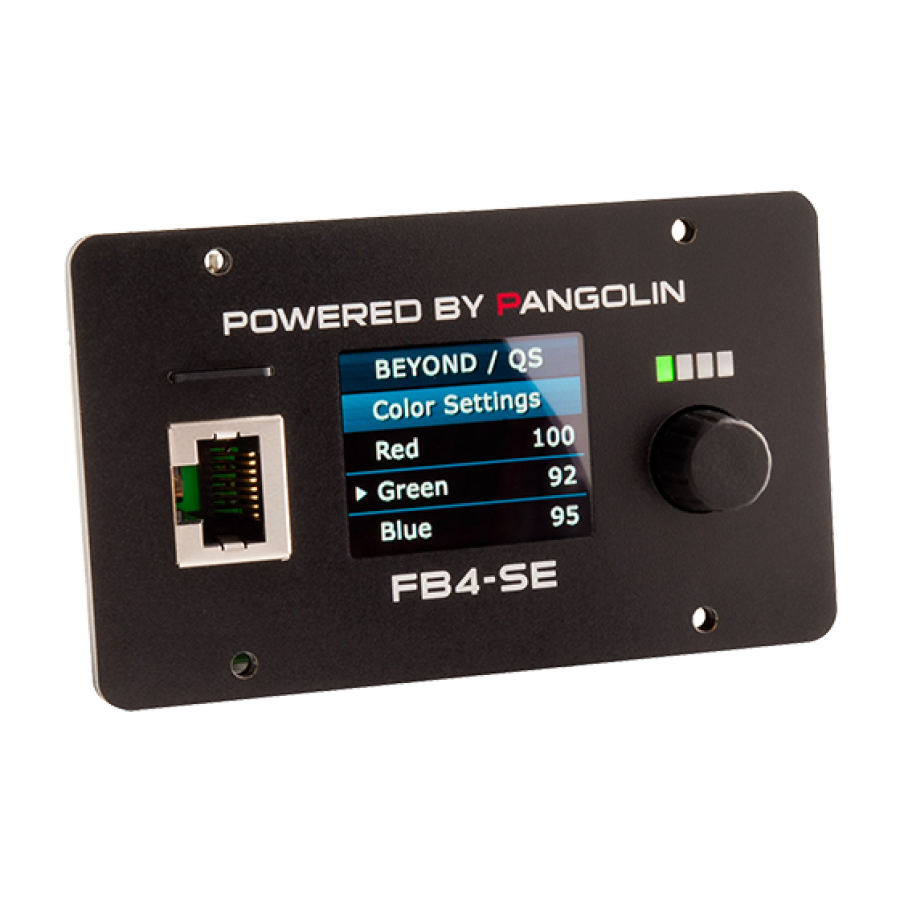
FB4 MAX is a new network hardware from Pangolin, that opens up a whole new world of possibilities for professional laser show control. FB4 MAX allows you to run your laser shows in a complete network setup (using standard CAT5 or CAT6 cable). It can also be controlled using DMX, ArtNet or ILDA. And it features on-board SD card memory (for automatic show playback). You can operate FB4 MAX from a lighting console, PC, or in auto-mode. And the full color OLED display on FB4 MAX also provides control over a variety of projector settings (including colors, safety, geometric correction and more). FB4 MAX also comes with the award-winning QuickShow laser control software absolutely FREE.
-
Overview
QuickShow is a complete laser system. It is capable of graphics as well as beam effects. It has everything you need for a modern laser light show. QuickShow includes the following capabilities:

Graphics
- Still frames (graphics and logos)
- Animated frames
- Abstracts
- Text
- Automated tracing of bitmaps (BMP, JPG, GIF)

Beams and atmospherics
- Beam targeting
- Beam shapes (fans, cones, waves, etc.)

Show production methods
- Live shows (laser jockey)
- Pre-programmed shows
- Mixed shows with both live and pre-programmed elements
Advanced technology
QuickShow isn’t just about a better user experience. It also has advanced technology such as the all-new Beyond calculation engine.
Beyond automatically takes care of scanner optimization and color mixing. In tests, QuickShow produced noticeably better image quality. One beta tester said: “It made my scanners look new again!”
-
QuickShow features
What you get
- QuickShow software on DVD-ROM
- Nearly 2000 pre-loaded cues
- Instruction manual
- Flashback 3 USB to ILDA adapter 4.2 x 2.8 x 1.3 in (110 x 71 x 33 mm)
- USB cable, to connect your computer to the Flashback 3 box
No dongles!
Never worry about forgetting or losing a dongle. You can work on, and display, shows without needing a dongle.
Cues
Nearly 2000 graphics, animations, beam effects and abstracts are included.
Abstract frames
Make planetarium-style abstract shapes, such as flowers or spirograph geometric figures.
Live controls
For a cue or the entire display, adjust size, position, rotation angle, rotation speed, color, color cycling, scan speed and animation rate.
QuickTools for creation and editing
QuickText, QuickShape, QuickTrace, QuickTargets, QuickTimeline, QuickDMX
Display methods
Single cue, multi-track cue, sequence cues, timeline show programming.
Display timing
Manual (mouse/keyboard), automatic to beat (BPM), autorun for sequences and timeline.
BPM methods
Timed, manual, or automatically triggers cues and effects to the beat of the music.
Preview
On-screen preview of all graphics and beams using Windows OpenGL.
Background work mode
Create/edit cues on-screen without affecting laser output. Only show your cues when you are done. The audience never sees your background work.
Autotrace bitmaps
Import GIF, JPG, BMP files and convert instantly to laser. Outline and centerline tracing modes.
Control DMX devices
Set up to 512 DMX channels per cue. Unlimited number of cues or “looks”
Custom effects
Apply one or more effects to a cue, a sequence or a timeline event. Effects include colors (preset and changing), pulse/flash/strobe, trace, chop, ripple, mirror, double, scroll, rock, throb, zoom and bounce.
Projector correction and zones
Full geometric correction for off-axis scanning. HIt multiple screens from one projector, using projection zones (cues are positioned and scaled to appear in part of the scan area).
-
Table of features
QuickShow satisfies every level of user
QuickShow is the only laser software designed to be very easy from the start, yet powerful enough for truly professional shows. The chart below shows how QuickShow expands with you, as your experience and needs grow.

-
Hardware requirements
Computer requirements
PC notebook or desktop with dual-core processor such as Intel Centrino Duo, Core 2 Duo, or AMD equivalent, 2Gb RAM memory
Operating system: Windows XP, Vista, 7 8, or 10
Monitor: Minimum resolution of 1024 x 768
At least one available USB port
Projector requirements
A lasershow projector with ILDA-standard input connector
Any speed scanners, from 10K to 60K+
Any color, from single-color to full-color RGB
Compatible with Analog or TTL color systems
Optional devices
Touchscreen QuickShow is designed so it can be used with a touchscreen notebook or monitor
MIDI controller Trigger cues using MIDI devices such as keyboards. A MIDI interface may be required to connect to computer’s USB port.
DMX interface Required for DMX input (a console triggers QuickShow cues) and for DMX output (QuickShow cues trigger external devices such as lights and foggers).
Pangolin recommends the Enttec DMX USB Pro
Optional control for up to six projectors
The QuickShow system comes with one Pangolin Flashback 3 laser controller. This small, palm-sized box connects between a USB port on your PC and the ILDA input connector on your laser projector. To control additional projectors, you can add up to eight more Flashback 3 laser controllers.

-
Guaranteed satisfaction
Pangolin has the most customer-friendly policies. For example, software updates are always free, your satisfaction is fully guaranteed, and we don’t force you to constantly use a USB “dongle” key to unlock your software.
These are among the many reasons that have made Pangolin’s software #1 around the world. So begin creating high-quality laser shows quickly, easily, and at an affordable price with QuickShow.
-
Tools
Whether you are new to lasers, or have years of experience, QuickShow adapts to your level:
- You can do basic shows right out of the box. All you have to do is click on cues, or press keyboard keys, to display them in time to the music. QuickShow comes with nearly 2000 pre-loaded graphics, animations, beam effects and abstracts.
- But there is far more power in QuickShow than simply triggering cues. The next level is the unique QuickTools, which are used to make custom cues such as auto-traced artwork, text, and beam bounces. For example, the QuickShape tool (discussed below) makes it easy to create abstracts and beam effects (cones, fans, planes, etc.).
- Finally, for the ultimate in customization, use advanced editors for professional-level features such as cue layering and sequencing, automatic beat triggering, timelines for syncing to pre-recorded music, triggering DMX channels, and controlling up to six projectors.
Example: Creating abstract shapes
To see how this works, let's look at creating various shapes such as abstracts. You can instantly call up a pre-defined shape (cue frame), or create your own basic shapes using the QuickShape tool, or get ultimate control using the Advanced Abstract editor.
See how these three levels work for creating abstract shapes. (Other QuickShow tools work in a similar way; for example, QuickText, QuickTrace, and QuickTargets.)
1: For an instant show, just click on pre-defined cue frames
Let’s say you want to display a preset psychedelic abstract design. Click the “Abstracts 1” tab on the main QuickShow screen. You’ll see 60 cues; each one contains an abstract design.

As you move your mouse over the cues, the designs are animated on the computer screen. This lets you preview how they’ll look on the laser projector.
To display the cue you want, simply click the mouse, or press the keyboard key that’s in the upper left corner. Instantly, the selected cue is displayed. It couldn’t be easier!
2: Add custom cues with QuickShape
The next level is to make your own custom cues. For abstracts, use the QuickShape tool, which lets you adjust the most important parameters such as size, points color, and speed.

3: For expert users, Advanced Abstract gives complete control
The Advanced Abstract editor lets you add layers of modulators, oscillators, color cycling, and other effects. Apply as many layers as you want, to make mesmerizing spirograph-type images that are difficult or impossible in other laser systems.

Work in the background
With other laser systems, as you click cues and change controls, your work is updated live to the laser. The audience sees every move you make – even when you don’t want them to.
QuickShow is much smarter. You can work in the background, setting up cues and trying out different looks. Nothing is sent to the laser until you click the “Show it now” button.
How background creation works
For example, let’s say you are projecting a beer mug...

... and you want to add some scrolling text advertising a “Drink special”. Call up the QuickText tab and type in the words:

Try out different looks and colors. You’ll see the text scroll and animate on the computer screen; the audience continues to see only the beer mug. We call this “background creation.” When you are satisfied, click “Show it now”. Your desired text now scrolls across the screen:

Thanks to background creation, it looks perfect as soon as it appears.
Control your shows using a variety of interfaces
Mouse
QuickShow can be run using just one hand, if you need your other hand free to adjust lights (or hold a drink!).
Keyboard
Press a key to switch cues on the beat of the music. There are 60 instant cues per screen (3 rows of 10 keys, each shifted or unshifted).
Touchscreen
QuickShow is specifically designed with large cues and controls, for fingertip use on touchscreen notebooks and monitors.
MIDI controller
Prefer to use a keyboard or other MIDI controller? You can map MIDI keys to cues and controls.
DMX console
Just like MIDI, you can map DMX channels to display cues and change controls. (Requires a USB DMX interface; Pangolin recommends the Enttec DMX USB Pro.)
Music beat
Let your music control the lasers. Automatically makes the laser follow the beat of the music with Virtual LJ.
Keyboard equivalents
Cue access
Cues can be accessed with the letter keys on the computer keyboard (A, S, D, F, etc.). Both shifted and unshifted keys are used to access the 60 cues per page
Cue editing
Copy cue = CTRL+C
Paste cue = CTRL+V
Delete cue = CTRL+X
Blackout
All laser output will be stopped by pressing the ESC key.
(Note: This is a convenience feature and should NOT be relied upon for safety features such as laser emergency stop.)
Pause
PAUSE mode is activated by pressing the PAUSE (break) key
Page access
Pages (cue tabs) may be assigned to Function keys F1 through F12
Beat-related keys
Tapping the SPACEBAR will generate beats and also adjust the speed of the timer. Pressing the BACKSPACE key will generate a beat and will re-synchronize the timer.
Virtual MIDI Keyboard
The Virtual MIDI Keyboard is shown or hidden each time CTRL+SHIFT+M is pressed. This graphic of a piano-style keyboard visually illustrates the mapping between cues and MIDI keys. (Pressing a cue can trigger a MIDI key; similarly, pressing a key on an external MIDI keyboard can trigger a cue).
Invert rotation speed
You can invert the rotation speed by pressing "`" or "~" (shifted or unshifted tilde key -- right below the ESC key).
-
Screenshots
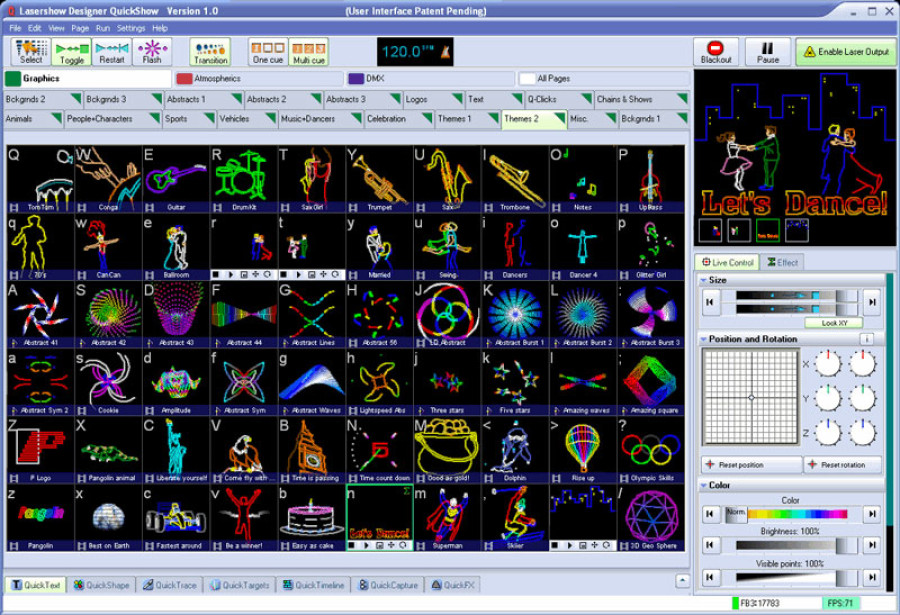
This is a typical QuickShow screen:

Within this screen, there are five main areas, plus the menubar. Click on the bars below to learn more about these areas.
Cue tabs and grid
The cue tabs at the top are used to select sets of cues (logos, still images, animations, text, abstracts, or beam effects).
- Clicking on a tab brings up a grid showing the available cues.
- Moving the mouse over a cue makes it animate (for moving cues) so you can see what it will look like.
- Clicking on a cue, or typing the letter in the upper left corner normally makes the cue appear on the laser.
Of course, you can add your own cues, and cue tabs, to create cue workspaces that are ideal for your needs. Each tab shows 60 cues on the grid. You can have up to 32 tabs, for a total of 1,920 cues in the workspace at any one time. If you need more, you can load and save cue workspaces as well.
At the very top of the cue grid are Categories (Graphics, Atmospherics, DMX and All Pages). By clicking a category, you see only the cue tabs associated with the category. This helps organize the tabs.

Symbols at the bottom left of each cue show the cue's type. In QuickShow, there are ten types of cues:
- Frame/Animation
- QuickText or Advanced Text
- QuickShape or Advanced Shape (abstract or beam shape)
- Timeline-based show
- QuickBeams
- Advanced Clock
- QuickDMX
- Synthesized image
- Sequence (chain) of cues
- Capture
Play mode buttons (at top)
The play mode buttons control how QuickShow displays cues:
- Select -- Selects a cue (for editing or drag-and-drop onto timelines) without activating it (so it is not seen on the laser output)
- Toggle -- Default mode. When you click on a cue, it starts playing; if you click on it again, it stops playing.
- Restart -- Cues are restarted when you click on them. For example, if you have an animation which counts down to zero, the countdown will restart each time you click on the cue.
- Flash -- Cues only remain active as long as you click and hold the mouse (or press and hold the keyboard key).
The Transition button affects switching between cues. Normally, if you click first on one cue then on another, the second cue appears immediately. If the Transition button is active (shown in green below), a morph is done between the two cues.
The One cue/Multi cue buttons select whether QuickShow displays just one cue at a time, or whether you can add additional cues on top of already-playing cues (layering).
The beat counter shows the selected Beats-Per-Minute. This is set by clicking on the BPM label or by tapping the spacebar, in time to the music. Once a beat is set, it can influence any animations, effects and beam targeting sequences that were set up to be "beat-based".

Preview window (top right)
The Preview window shows how the cue will look. Note that in the window below, there are four cues being shown simultaneously: dancers on the right, dancers on the left, the words "Let's Dance!" and the city skyline. This is one of the great features of QuickShow -- the ability to easily layer cues.
Also in this area is the "Blackout" button, which immediately stops laser output. The "Pause" button freezes the output, so that any animation or cue sequence stops. Finally, the "Enable Laser Output" button sends what is in the Preview window to the laser projector. Note that if you do NOT have "Enable Laser Output" activated, you can work only on your computer monitor. The audience will see the last-projected cue and will not see your new work until you re-enable laser output. This feature is very useful, and is unique to QuickShow.

Output and effect controls (right side)
On the right are controls that affect the laser output. The Position and Rotation controls affect the location of the image, and the rotation amount and speed. The Color controls let you change the color and brightness of the output. A tab not shown here (you scroll down to get it) is Playback, which sets the animation speed and scanrate for the output.
The "Live Control" tab makes the controls affect the entire laser output (all cues and all tracks). The "Effect" tab gives you the same controls but these affect only the currently-selected cue.

QuickTools (at bottom)
A major benefit of QuickShow is fast access to the QuickTools. When you click on a tab at the bottom, you can quickly and easily do tasks such as:
- Create non-moving or scrolling text
- Create basic shapes and abstracts
- Trace logos and outline drawings
- Set mirror targets for beam bounces
- Put cues on a timeline to create a stand-alone show
- Capture the currently-playing output as a single cue
- Add special effects to cues
To view the controls for a QuickTool, you simply click the up-arrow button on the right side, after all the tabs.

Menu bar (at very top)
QuickShow also has a standard menu bar, at the top. This contains standard computer features such as loading and saving cues, plus menus for preferences and special functions.

Quick to setup
It is easy to get QuickShow adjusted for your projector and screen. Click on the bars below to learn more about QuickShow's various setup screens.
Quick Setup wizard
The Quick Setup wizard gets you started fast. It has three main screens:
- In step 1, you specify your user level -- whether you are a beginner, intermediate or advanced user. This adjusts QuickShow so it displays only the functions, menus and controls best for your experience level.
- In step 2 (shown below), you indicate what type of scanners you have. QuickShow works with any type of laser galvanometer scanners. Even if you have slower 8K to 12K scanners, you'll be amazed at the results QuickShow can give you. One beta tester said "It made by scanners look new again!"
- In step 3, you indicate the number of different colored lasers you have in your projector. QuickShow works with projectors with one, two or three laser colors. This lets you get the maximum number of colors possible out of your particular projector type. (For example, if you have three laser colors they are usually red, green and blue, giving you the widest range of colors.)
- In step 4, you specify if you use a TTL or Analog color system

Projector settings
It takes only a few seconds to size the laser output to fit your projection screen, and to flip it if necessary for rear-projection.

Projection Zones settings
Projection Zones is an ILDA Award winning technology, first pioneered by Pangolin. To understand how it works, imagine that you are in a disco and you want to hit various targets.
You might want graphics on a main screen, beams to hit target mirrors, beam shapes to scan onto the audience, and scrolling text underneath a TV display. Each of these differently-shaped zones becomes a Projection Zone, such as Scanner 1 Main, Targeted Beams, Atmospheric and Secondary Graphics.
Each laser cue is assigned to a zone. This ensures that graphics end up on the main screen, while beams can hit their mirror targets.
Each Projection Zone has sophisticated geometric correction; this fixes any graphics distortion caused by off-axis projection. Each zone also has a "beam attenuation map", used for safety. You literally paint how bright or dark you want the laser to be in certain areas such as where the audience is. This lets overhead beams be full-power, while reducing power in audience areas. (Caution: Safe audience scanning requires knowledge and measurements; do not rely solely on any beam attenuation map for safety.)
Because zones can be used for different purposes, such as graphics or beams, each zone lets you set up how the preview window looks (shown on your computer screen). For beams, the preview window actually simulates the look of beams in foggy air. If you are sending a single output to two separate beam scanners, such as one on either side of a screen, the preview window can even simulate this.
You can have up to 30 Projection Zones. This should be more than enough for even the most complex projection situation!

QuickTargets beam settings
A common situation is using bounce mirrors to reflect the laser beam around a room or venue. To set this up, use the QuickTargets Beam Settings controls.
You can target up to 32 different bounce mirrors (or other beam targets such as mirror balls or diffraction gratings). Just drag-and-drop a square to position a beam. You can also assign a relative power to a beam; for example, if you want some beams to be dimmer than others for safety reasons.

QuickTools
QuickTools are used to create and edit new laser frames, animations, and beam shapes. They are available by clicking tabs on the QuickTool area of QuickShow's main screen.

QuickText
Create non-moving text, as well as scrolling and animated text using 12 preset effects. QuickText supports all fonts on your computer system.
As the mouse passes over each effect icon below, the icon animates to show what the effect does. To save your finished QuickText as a cue, just drag it from the preview window (below right) onto one of the cue grid slots.

QuickShape
Create simple shapes such as circles, squares and triangles, as well as more complex shapes such as waves and loops. The shapes can be used either as projected graphics, or to create mid-air beam patterns in fog (fans, cones, waves, etc.).
First you choose a base shape. Any of the shapes can be either continuous (leftmost button that looks like a diamond) or it can be a series of points (starburst button) that is very handy for beam shows. Then you can add an effect to further modify the shape and/or color. If you are in point mode, the Beam Speed slider is active and controls how fast the laser moves from point to point.
As the mouse passes over each effect icon below, the icon animates to show what the effect does. To save your finished QuickShape as a cue, just drag it from the preview window (below right) onto one of the cue grid slots.

QuickTrace
With QuickTrace, you can trace a graphic image such as a BMP, JPEG or GIF picture. This makes it easy to do logos and custom artwork.
Tracing happens almost instantly. Various controls help you fine-tune the trace, to get the best results. For example, you can trace either the outline of an object (as shown below) or the centerline (this is best for line drawings).
To save your finished trace as a cue, just drag it from the preview window (below right) onto one of the cue grid slots.

QuickTargets (beam sequencing)
QuickTargets creates a sequence of beams, which are aimed at bounce mirrors, diffraction gratings, or other targets.
The target locations are set up using a separate screen, the QuickTargets Beam Settings dialog. In fact, you will not see the QuickTargets tab or controls until you have set up the QuickTargets Beam Settings dialog.
The controls below let you set the sequencing of when the targets are hit, such as making a chase. In addition, you can specify the color of the beam. For example...
- in Step 1 below, there are two beams: a green beam on target 1, and a red beam on target 7.
- In Step 2, a green beam is on target 2, while the red beam remains on target 7.
- In Step 3, a green beam is on target 3, while the red beam remains on target 7.
- In Step 4, a green beam is on target 4, while the red beam remains on target 7.
The visual effect is that a green beam is chasing through the first four targets, while a red beam is fixed (unmoving) on target 7.
The duration controls at the top set whether the beams switch on the musical beat or a clock beat (seconds), and how many beats/seconds pass before the beam moves to the next sequenced location.
To save your finished QuickTarget as a cue, just drag it from the preview window (below right) onto one of the cue grid slots.

QuickTimeline
This creates a timeline-based laser show, including music if desired.
Simply drag-and-drop a cue from the cue grid onto a timeline track. Stretch the cue to match the music (note the waveform in the top track). Add effects to the timeline event, such as fading in and out, or color modulation. The vertical red line is the cursor; the preview window at right displays what the show looks like at the cursor position.
This is by far the quickest way to make a show that will always exactly match a piece of music.
To save your finished timeline show as a cue, just drag it from the preview window (below right) onto one of the cue grid slots.

QuickCapture
This captures the currently playing output -- whatever is being shown on the laser -- into a single cue. For example, you might combine a couple of graphics elements (each in their own cue) with some text.
Simply click the QuickCapture tab and the laser output is captured into a blank cue.

QuickFX
QuickFX is different from the other QuickTools. It applies effects (zooms, splits, rotations, etc.) on top of cues that are currently playing. This adds movement and variety to your laser shows, with just the click of a button.
There are four layers of effects, so up to four effects can be active simultaneously. In the screen below, there is a green-blue color effect which ripples through the image; the image is doubled, and the doubled image moves sideways from left to right and back again. Because the Master button is pressed, this effect controls all currently-playing cues. (If the Cue button was pressed, the effects would apply only to whatever cue was currently selected.)
As the mouse passes over each effect icon below, the icon animates to show what the effect does.

Advanced editors
QuickShow has everything you need for quality laser shows. The advanced editors let you create complex laser graphics, that go beyond the QuickTools. These are similar to the editors in Pangolin's Lasershow Designer 2000, the best-selling professional-level software. However, we have updated and simplified these as far as possible, to make them easier to use for new and part-time laserists.
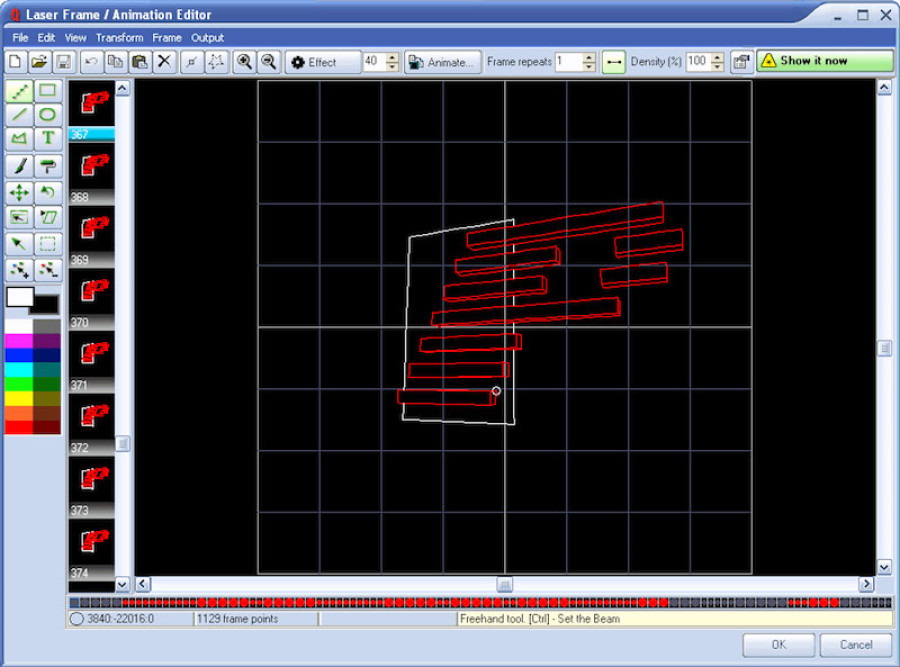
Laser Frame/Animation editor
The Frame and Animation editor is a full-featured 2D graphics editor. It works similar to a paint program, but has special controls and optimized output for laser graphics.
Drawing tools (left side, in green) include: Dot, Square, Line, Circle/Oval, Polygon, Text, Paintbrush, Paint Roller, Position, Rotate, Resize, Skew, Select Point, Select Area, Add Points, and Delete Points.
The Frame and Animation editor also includes animation tools. For example, you can set a start and end frame, and have the system create the in-between (morph) frames for you.
Each animated cue can be one of three types: refresh-based, time-based or beat-based. Each type is best for certain styles of animating. This is an example of how QuickShow, while simple to use, gives you access to advanced settings that are essential for making high-quality shows.

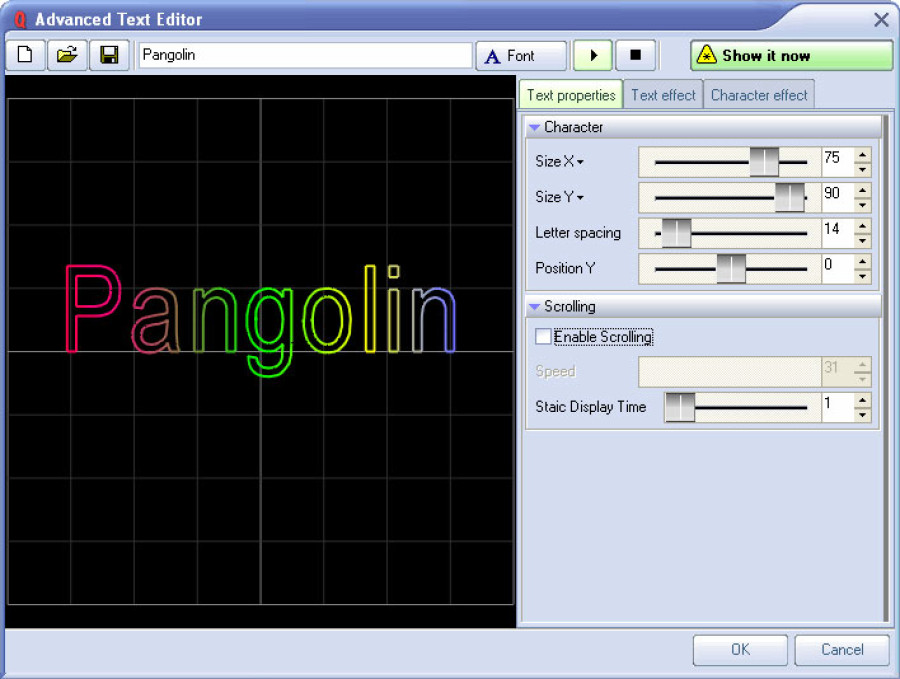
Advanced Text editor
The Advanced Text editor goes beyond QuickText, to give you complete control over letterspacing, linespacing, text proportion and other aspects of text.
Use this to create both static text (single images) and animated & scrolling text.
Effects can be applied to the entire word/phrase or to each character individually. Using the "Character effect" tab's controls, it's easy to make text that automatically waves and moves to the beat of the music. For example, each letter in sequence could grow in size and rotate as it flies into its final position in the word.

Advanced Abstract editor
One of the most crowd-pleasing laser effects is abstract images. The very first laser shows in planetariums, around 1974, used analog-created abstracts to bring the viewer into another world of shape and color.
QuickShow's Advanced Abstract editor lets you create digital abstracts that are repeatable and editable. It works like the QuickShape tool, with the ability to add more layers and effects. To use it, select a base shape and then add additional oscillators, modulators and effects to get harmonious phasing and pulsating. Colors, too, can be modulated.
The Advanced Abstract editor literally has limitless combinations.

Advanced Clock editor
For New Year's Eve, a clock is essential. Even for nightly shows, a laser-projected clock is impressive and useful ("10 minutes until last call").
With the Advanced Clock editor, you can create just about any type of clock or countdown you need. Both digital and analog clocks are included.
